
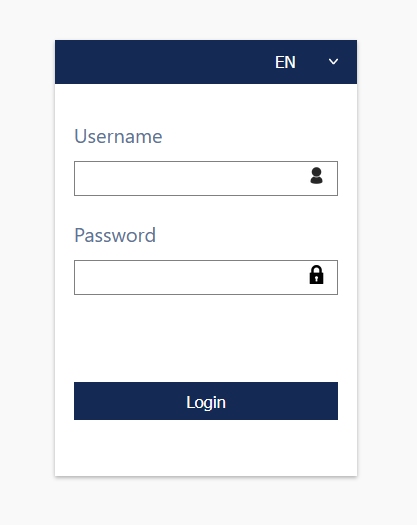
To access the control panel of the Council Stream platform, click on LOG-IN from the menu at the top of the page and enter your username and password.
Once you log-in successfully, you will see the dashboard with four menu sections.
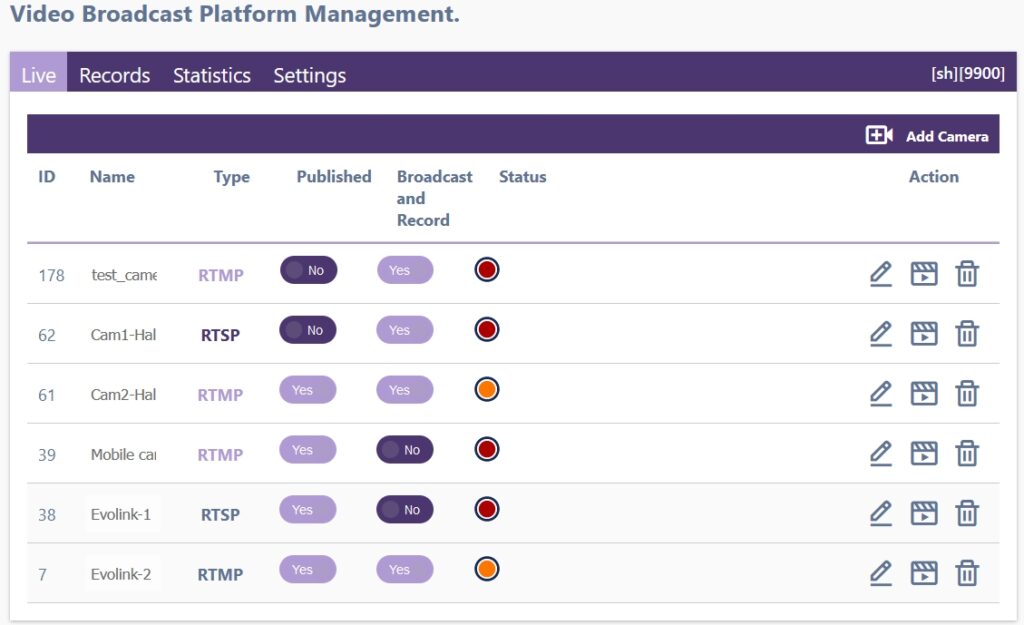
The menu section “Live” is used to manage the cameras or other video sources that you have. The list shows all cameras and their respective type (RTMP or RTSP). The icons on the right allow you to edit, preview and delete. The field Status shows indication in color about the state of each camera.
Buttons for “Published” and “Broadcast and Record” are active only when “edit” is selected. This is made on purpose to prevent accidental action with the respective camera.
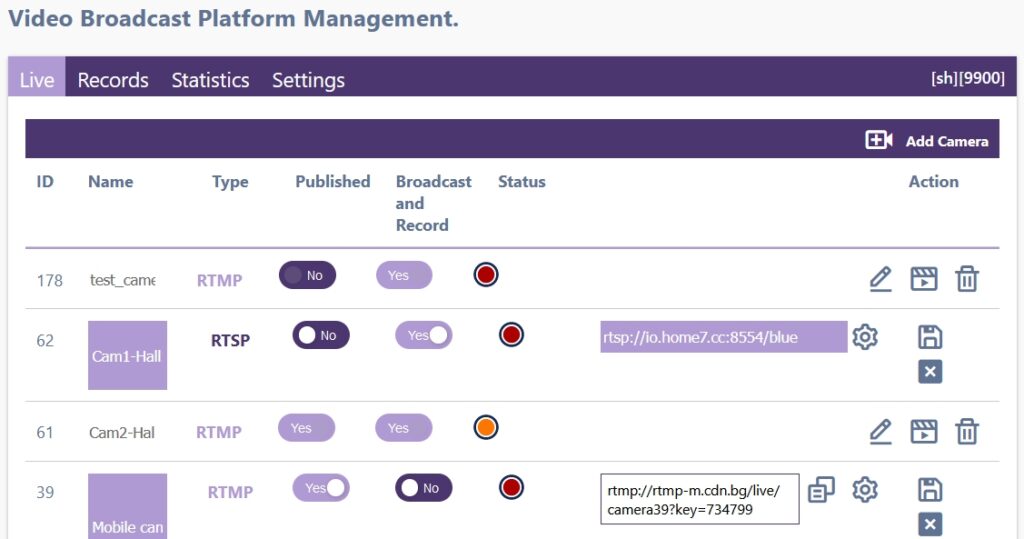
For each camera we can modify setting by pressing the edit button. We can change the name by simply entering a new text in the Name field. To deactivate it and remove public section by turning the “Published” switch to No. To start or stop Streaming and Recording with the switch “Broadcast and Record“. “Expert settings” are there to configure how video stream will reach the CDN platform.
“Published” switch: It basically activates this camera and makes it visible in the public section that you embeded in your web site. It should always be on “Yes” if you plan to use this camera at some time. When set to “No”, the camera is not visible on the public site, it can not broadcast from the platform and CANNOT be recorded.
“Broadcast and Record” switch: It is used to play or stop the streaming from the corresponding camera in the public part of the platform, which automatically results in the creation of a video recording. Use this switch to start/stop streaming from RTSP cameras, that are always on. Make sure that “Published” is turned to Yes.
The edit icon ![]() enables configuration changes to the respective camera.
enables configuration changes to the respective camera.
The preview icon ![]() will activate a player in which you can watch what the corresponding camera is broadcasting.
will activate a player in which you can watch what the corresponding camera is broadcasting.
The delete icon ![]() is used when you want to remove the camera from the platform.
is used when you want to remove the camera from the platform.
Expert settings (RTSP): When using RTSP camera, you have to add the full address of the camera in this field. Note. The address must be accessible via the Internet. Most often, the cameras have private IP addresses (from networks 192.168.0.0/16, 10.0.0.0/8, etc.), which requires adding a rule in the firewall or in the municipal router to allow access through Internet to the corresponding camera.
Expert settings (RTMP): When a camera with RTMP protocol support is added, the platform automatically generates an address (URL) that appears in the field. You have to input this URL in your camera. Also use this address if you would like to stream from software or a smartphone. It is universal and widely used in multiple devices and software to broadcast content. You can learn more in the article Online broadcasting via RTMP protocol.
Expert settings (RTMP) Generate new password: Use this option when you want to change the password for the corresponding address. If you’ve changed the camera, given the broadcast address to an outside company or provider, done some specific broadcasting and just want to change the access details so that no one else can broadcast content through that camera.
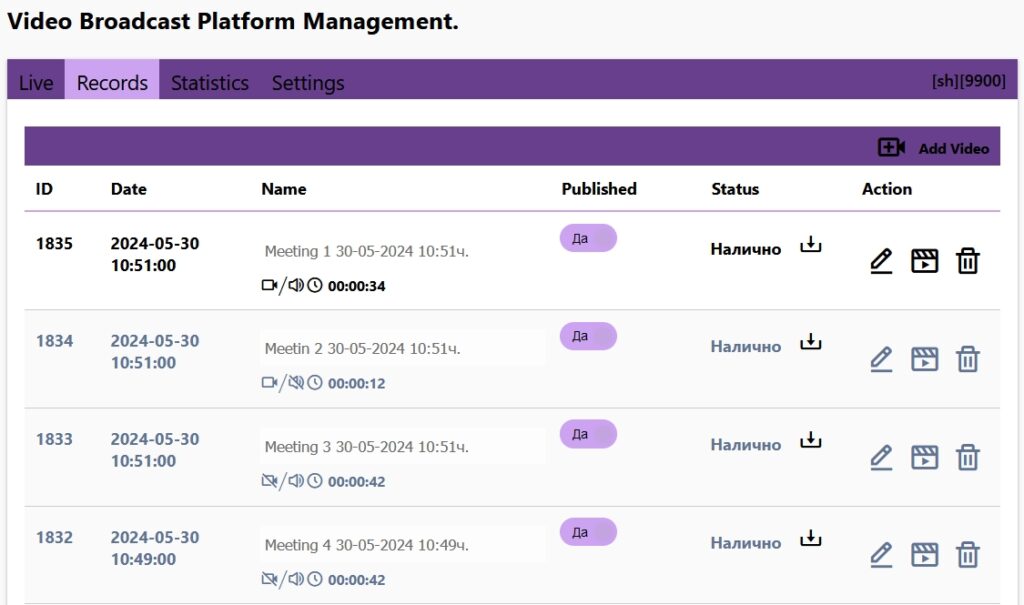
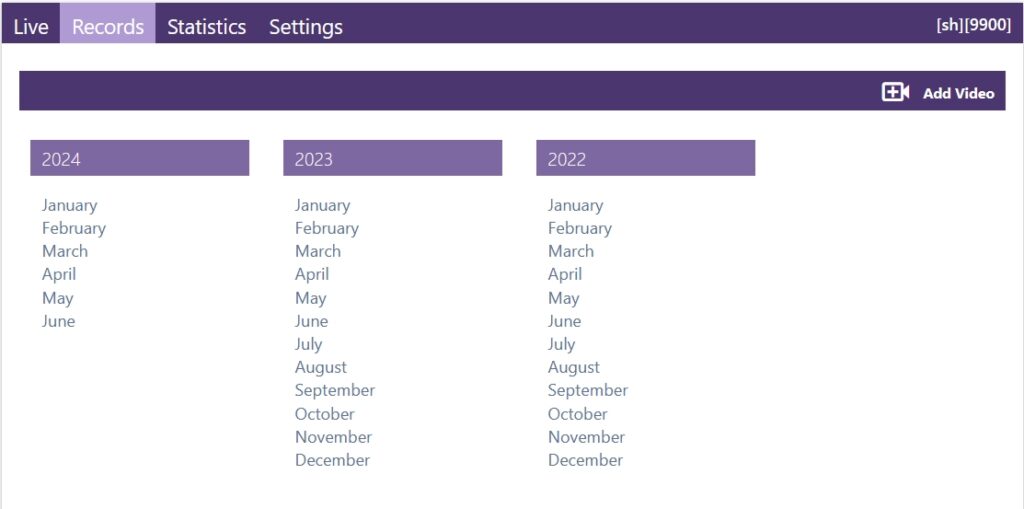
The “Recordings” section displays a list of all automatically made recordings from the cameras, as well as manually added ones for the correspondingly selected month.
The edit, view and delete icons can be used to take action on the respective video.
The “Published” key is active only at the time of editing the record.
All entries have automatically assigned names based on the time they were published. You can change the names with more appropriate ones at your convenience.
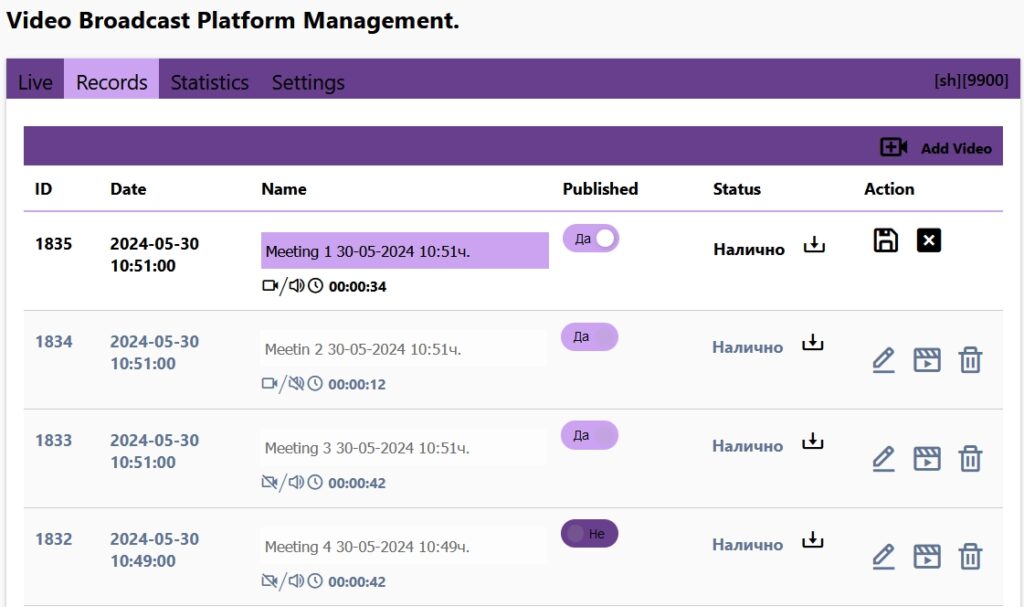
The icon Edit ![]() : Is used to change the name of a recording.
: Is used to change the name of a recording.
The switch “Published“: Makes the recording visible or invisible in the public interface.
The icon Preview ![]() : Shows a video player to preview the selected recording.
: Shows a video player to preview the selected recording.
The icon Delete ![]() : Deletes the respective video file from the platform.
: Deletes the respective video file from the platform.
The Add Video menu: Allow you to add a video that was recorded externally outside of the platform. You should select a date and time for this video, so that it appears in the correct place in the calendar.
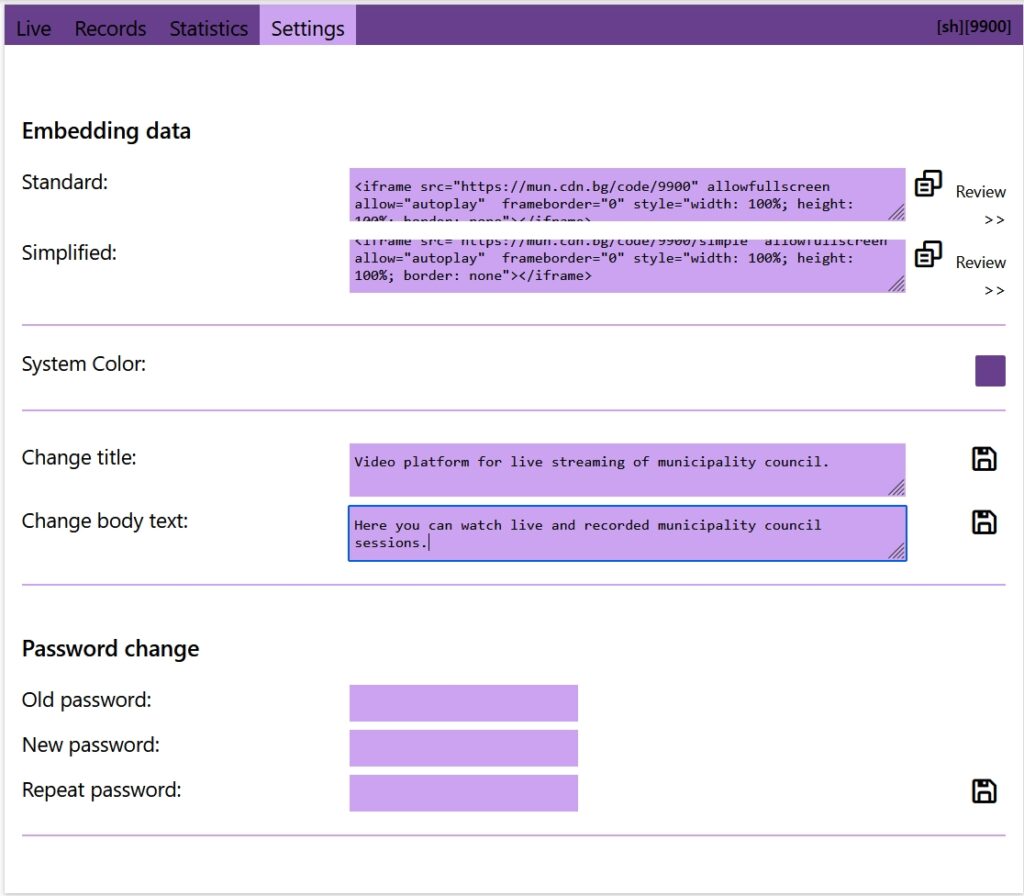
From the “Settings” tab you can take the embed code (HTML code), to change the outlook and colors, to change titles in the public part and also to change your password for the platform.
Section “Embedding Data“
In this section you will find the necessary HTML code that you should embed in the website of the municipality. It will make all video content visible in your web site. The type of the code is HTML, and it contains everything needed, so once it is published on the page, all live broadcasts and recordings will appear automatically.
You can choose between two options for the embed HTML code:
Standard: This is the public site version that includes title text, Live section and Recordings section. It also has a calendar with months visible to make navigation easier.
Standard view
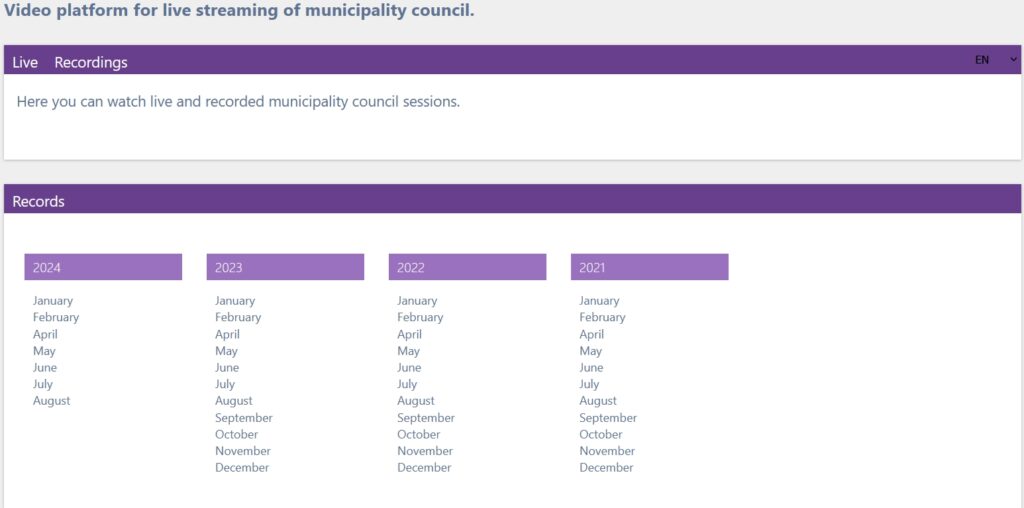
The Standard embed code looks like: <iframe src="https://mun.cdn.bg/code/xxxx" allowfullscreen allow="autoplay"  frameborder="0" style="width: 100%; height: 100%; border: none"></iframe>
Note. xxxx is your customer code that will be automatically assigned.
Simplified: It has the same content, but in more simple view.
Simplified view:
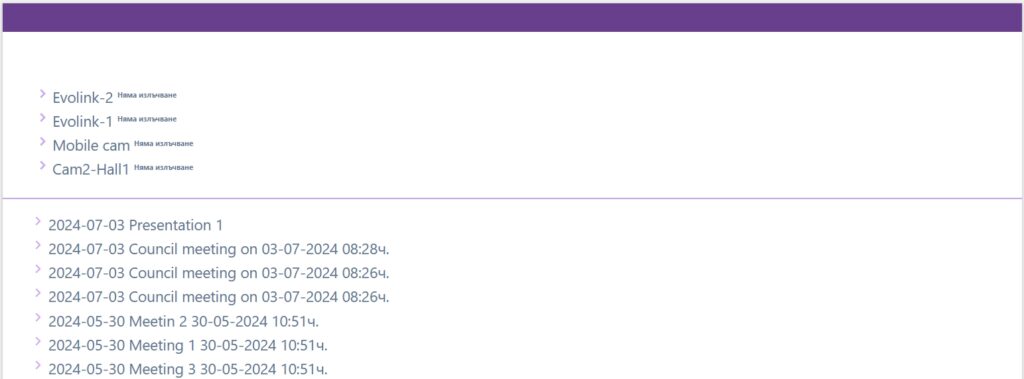
The Simplified embed code looks like : <iframe src="https://mun.cdn.bg/code/XXXX/simple"  frameborder="0" style="width: 100%; height: 100%; border: none"></iframe>
Note. xxxx is your customer code that will be automatically assigned.